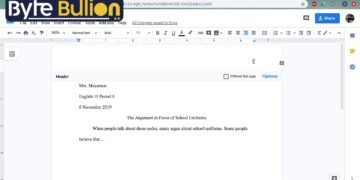



An MLA format header is the block of identifying information that sits at the top of the first page of a paper written in Modern Language Association style. It tells your reader who wrote the paper, who assigned it, which course it belongs to, and when you turned it in. Many students confuse this block with the running head that carries the page number, and that small mix-up often costs easy points. This guide breaks down every part of the MLA header in plain language, shows you real examples, and walks you through the setup in both Microsoft Word and Google Docs.
What Is an MLA Format Header?
The MLA header is a four-line block placed in the upper left corner of your first page. It sits one inch from the top, lines up with the left margin, and stays double-spaced just like the rest of your paper. Each line holds one detail in this exact order: your full name, your instructor’s name, the course number, and the due date.
Keep the header in the same font as your body text, which is usually 12-point Times New Roman. Write the date in day-month-year style, such as 5 May 2026, and avoid periods or extra punctuation at the end of each line. This block appears only once, on the first page, and never repeats.
MLA Header vs. Running Head
People often treat these two terms as the same thing, but they do different jobs. The header (sometimes called the heading) shows up only on page one and lists your identifying details. The running head appears in the top right corner of every page and shows only your last name followed by the page number.
To build the running head, click into the header area of your document, align the text to the right, type your last name, add one space, and then insert the page number. Number each page with Arabic numerals (1, 2, 3) placed half an inch from the top edge. Some instructors ask you to leave this off the first page, so always check your assignment sheet first.
How to Set Up an MLA Header in Microsoft Word
Follow these steps to create both parts correctly:
- Set your font to Times New Roman, size 12, and turn on double spacing.
- Type your four header lines in the top left: name, instructor, course, and date.
- Go to the Insert menu and click Page Number, then choose Top of Page and Plain Number 3.
- Click in front of the page number, type your last name, and add one space.
- Highlight the running head and match it to Times New Roman, size 12.
Once you finish these steps, press Enter below the date and center your title on the next line. Your body paragraphs then start directly under the title, with no title page needed.
How to Set Up an MLA Header in Google Docs
Google Docs makes the process just as quick:
- Set the font to Times New Roman, size 12, and choose double spacing from the line spacing menu.
- Type the four header lines flush with the left margin.
- Click Insert, then Headers & footers, and select Header.
- Right-align the header, type your last name, add a space, then click Insert and Page numbers.
- Adjust the running head font so it matches the rest of your paper.
After the header area is ready, return to the main page, center your paper’s title in title case, and begin writing. Keep the title plain, with no bold, italics, underline, or quotation marks.
MLA Header Example
Here is what a correct first-page setup looks like. The running head sits in the top right corner, and the four-line block sits in the top left.
Rivera 1

John Rivera
Professor Adams
English 101
5 May 2026

          The Power of Symbolism in Modern Poetry

     Every reader carries a set of images into a poem...
Notice that the title is centered, not bold, and every element uses the same font. This clean structure is exactly what graders expect from an MLA paper.
Common Mistakes to Avoid
Small errors in the header can lower your grade, so watch for these frequent slips:
- Adding a period or comma at the end of each header line
- Bolding, underlining, or italicizing your name or title
- Writing the date as May 5, 2026 instead of 5 May 2026
- Forgetting the running head or the page number on later pages
- Creating a separate title page when your instructor did not request one
A quick review before you submit catches most of these problems. Read each line slowly and compare it against the rules above to keep your formatting sharp and consistent.
Conclusion
The MLA format header is simple once you know the pattern: a four-line block on page one and a running head on every page. Set your font, follow the order, and double-check the small details. Get these basics right, and your paper looks polished before the reader even reaches your first sentence.
Frequently Asked Questions
What goes in an MLA format header?
It includes four lines: your full name, your instructor’s name, the course number, and the due date, all left-aligned and double-spaced.
Is the MLA header the same as the heading?
Yes, the terms are used for the same first-page block. The running head with your last name and page number is a separate element.
Does the MLA header appear on every page?
No. The four-line header appears only on the first page. The running head with your last name and page number appears on every page.
What font should an MLA header use?
Use the same font as your body text, usually 12-point Times New Roman, with no bold, italics, or underlining.
Do I need a title page in MLA?
No, MLA does not require a title page. Add one only if your instructor asks for it or the paper is a group project.
Find what’s next and explore more at Byte Bullion