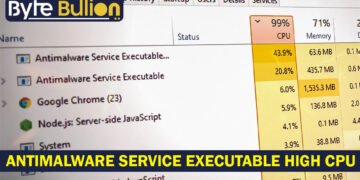



Antimalware Service Executable high CPU is one of the most common performance problems Windows users face, and it can slow your computer to a crawl. This background process belongs to Microsoft Defender, and it usually runs quietly in the background. Sometimes, though, it grabs a large share of your processor and keeps the fans spinning for hours. The good news is that you do not need to remove your antivirus to solve it. This guide explains what the process does, why it spikes your CPU, and how to fix it safely on both Windows 10 and Windows 11.
What Is Antimalware Service Executable?
Antimalware Service Executable, also called MsMpEng.exe, is the core scanning engine of Microsoft Defender Antivirus. It runs in the background and checks your files, downloads, and open programs for threats in real time. When it finds something harmful, it removes the file or moves it to quarantine. On a healthy system, this process uses only about 1 to 5 percent of your CPU.
You can see it yourself in Task Manager. Press Ctrl + Shift + Esc, open the Processes tab, and look under Background processes. Short spikes are normal, especially right after an update or during a scheduled scan. A real problem exists only when the high usage lasts a long time and makes your PC feel sluggish.
Why Does It Use So Much CPU?
The main reason is real-time protection. Microsoft Defender scans files the moment you open them, so heavy file activity naturally raises CPU use. A full system scan also demands a lot of power, and it often starts at the exact moment you wake your computer. Another odd cause is that Defender sometimes scans its own folder, which creates a loop of extra work.
Other triggers include a scan that gets stuck on a corrupted file, outdated security definitions, or a conflict with a second antivirus program. In rare cases, malware hides by using the same name. Because the causes differ, it helps to try a few fixes in order until your CPU use drops.
How to Fix Antimalware Service Executable High CPU
Reschedule Windows Defender Scans
Moving scans to a quiet time keeps your protection on without hurting your work. Open the Start menu, type Task Scheduler, and open it. Go to Task Scheduler Library, then Microsoft, then Windows, then Windows Defender.
Double-click Windows Defender Scheduled Scan. On the General tab, uncheck “Run with highest privileges.” On the Conditions tab, clear the boxes. Then open the Triggers tab, click New, and set a weekly scan for a time when you rarely use the PC. Save your changes and restart.
Add an Exclusion for the Process
Telling Defender to skip its own files often stops the loop that drives CPU use up. Open the Start menu, type Windows Security, and select Virus & threat protection. Click Manage settings, scroll down, and choose Add or remove exclusions.
Click Add an exclusion, pick Process, and type MsMpEng.exe. You can also add the folder C:\Program Files\Windows Defender. Gamers should exclude large game libraries, such as the Steam folder, so Defender stops rescanning shader and update files.
Run a Full Scan to Clear a Stuck Scan
Sometimes a scan freezes on one file and never finishes, which keeps the engine busy. A complete manual scan forces Defender to end the job properly. Open Windows Security, select Virus & threat protection, and click Scan options.
Choose Full scan and click Scan now. Let it finish, even if it takes an hour or more. After it completes, check Task Manager to confirm that MsMpEng.exe has settled back below 5 percent.
Perform a Clean Boot to Find Conflicts
A clean boot starts Windows with only essential services, so you can spot software that fights with Defender. Press Windows + R, type msconfig, and press Enter. On the Services tab, check “Hide all Microsoft services,” then click Disable all.
Restart your PC and watch your CPU. If usage drops, a third-party app was the cause. Turn the services back on one by one until the spike returns, and you will find the guilty program. Many users trace the problem to a second antivirus tool running at the same time.
Check for Malware in Disguise
If nothing helps, a virus may be copying the process name to avoid notice. A full scan with a trusted second-opinion tool can catch what the built-in scanner misses. Right-click the suspicious process in Task Manager and choose Open file location.
The real file sits in C:\Program Files\Windows Defender. If you find a copy somewhere else, treat it as a threat and run a deep scan. Remove anything the scanner flags, then restart and check your CPU again.
Conclusion
Antimalware Service Executable protects your PC every day, so disabling it should be your last resort. Rescheduling scans, adding exclusions, and running a clean boot fix the high CPU issue for most people while keeping security intact. Work through the steps above, and your Windows 10 or 11 machine should run smoothly again.
Frequently Asked Questions
Is it safe to disable Antimalware Service Executable?
Turning it off leaves your PC open to threats, so avoid it unless you install another trusted antivirus first.
Why does MsMpEng.exe use so much CPU?
It scans files in real time and during full scans. Stuck scans, software conflicts, or scanning its own folder can push usage higher.
Can I permanently remove Antimalware Service Executable?
No, it is a built-in part of Microsoft Defender. You can only pause it or replace Defender with another antivirus program.
Does high CPU from this process mean I have a virus?
Usually not, since it is normal during scans. But malware can copy the name, so run a full scan if usage stays high for a long time.
Will excluding files reduce my protection?
Excluding your own trusted folders is low risk. Avoid excluding system folders or unknown files so your PC stays safe.
Find what’s next and explore more at Byte Bullion